In order to preserve the folder/label structure of both accounts, our migration tool places transferred email inside a label named after the source account. If you would prefer to unnest these labels, you can do so by following these steps:
-
Log into your account via webmail (not via email client).
-
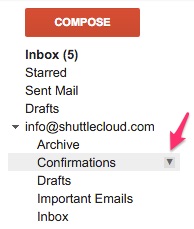
In the folder list on the lefthand side, hover over the label for the nested folder and click the arrow to the right of the label name.
-
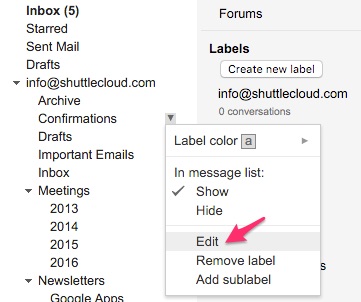
Select "Edit" from the dropdown menu.
-
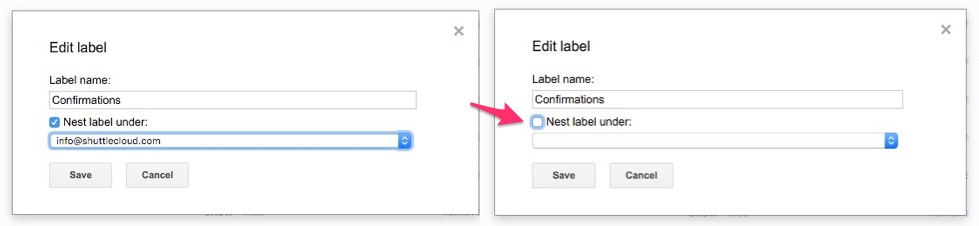
The popup window will allow you to unnest the label and move it up one level. Unnest the label by unchecking the "Nest label under" checkbox. All of the emails within the label will move as their respective label structure is changed.
If Gmail says that the given label already exists, you can work around this by applying the desired label and then removing the old one. First, open the label containing the messages you'd like to re-label. Then click the "Select: All" link. Click the "Select all [#] conversations in [label]" to ensure your changes apply to every message with this label. Select the label you wish to use from the label dropdown menu, and uncheck the label(s) you would like to remove.
If Gmail will not let you un-nest the label because it's a reserved system label, you can work around this by moving the emails to the desired system label and removing the old label. First, open the label containing the messages you'd like to re-label. Then click the "Select: All" link. Click the "Select all [#] conversations in [label]" to ensure your changes apply to every message with this label. Click the "Move to" folder icon and select the system label from the label dropdown menu. Then uncheck the label you would like to remove.
For more information, please see Google's own documentation on labels.